
ACH payments have become a critical part of modern accounts payable operations. As organizations process higher payment volumes and face increasing compliance and audit requirements, finance teams need payment processes that are secure, efficient, and fully integrated within their ERP system.
NetSuite's ACH payment capabilities help organizations automate vendor payments, reduce reliance on paper checks, strengthen financial controls, and improve visibility across the entire payment lifecycle. By centralizing payment processing within NetSuite, businesses can enhance operational efficiency while maintaining greater control over cash management and vendor disbursements.
In this guide, we'll explore how ACH payments work in NetSuite, including setup requirements, payment file generation, approval workflows, vendor notifications, and payment management best practices.
Prerequisites for Electronic Payments
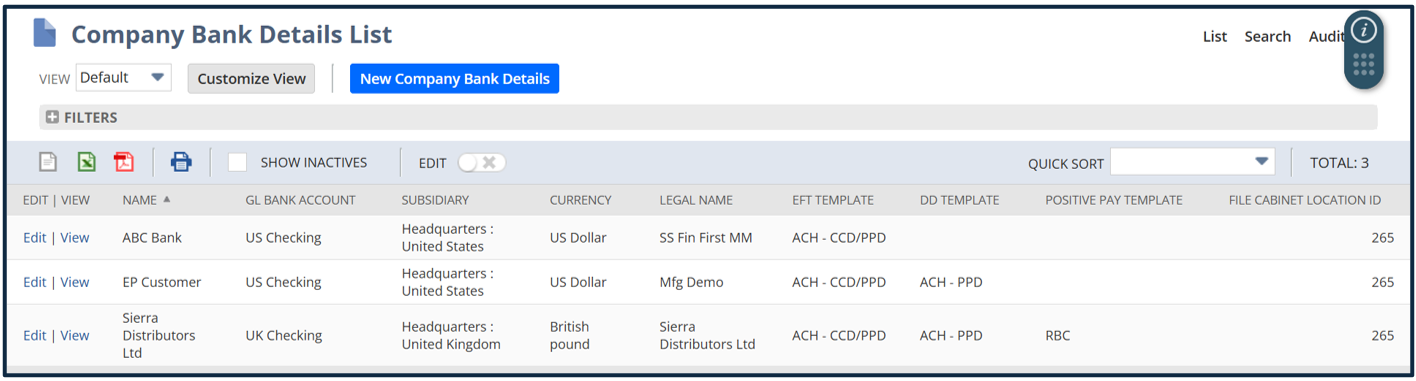
Company Bank Setup
- Navigate to Payments > Setup > Bank Details.
- Verify that the company bank details appear on this page.
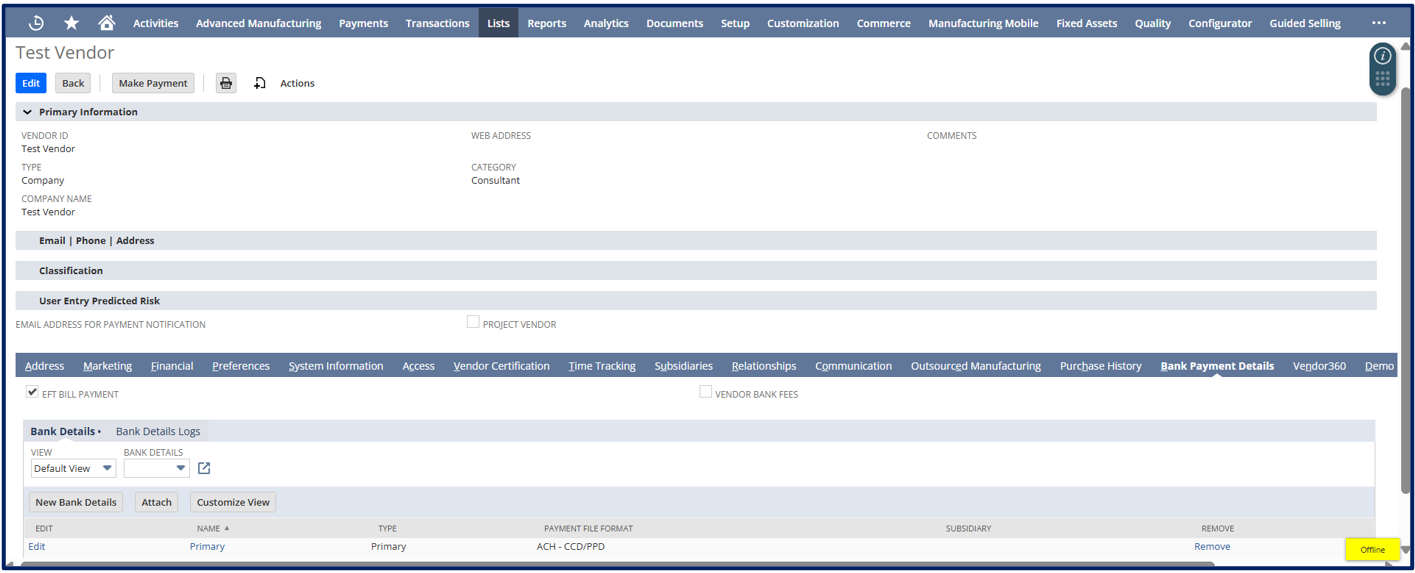
Vendor Bank Setup
To begin the ACH payment process:
- Enter all required details in the vendor record.
- Check the EFT Bill Payment checkbox.
- Click Save to create the vendor record.
- Open the saved vendor record again.
- Navigate to the Bank Payment Details section.
- Click New Bank Details.
- Enter the vendor’s bank details.
- Save the bank details.
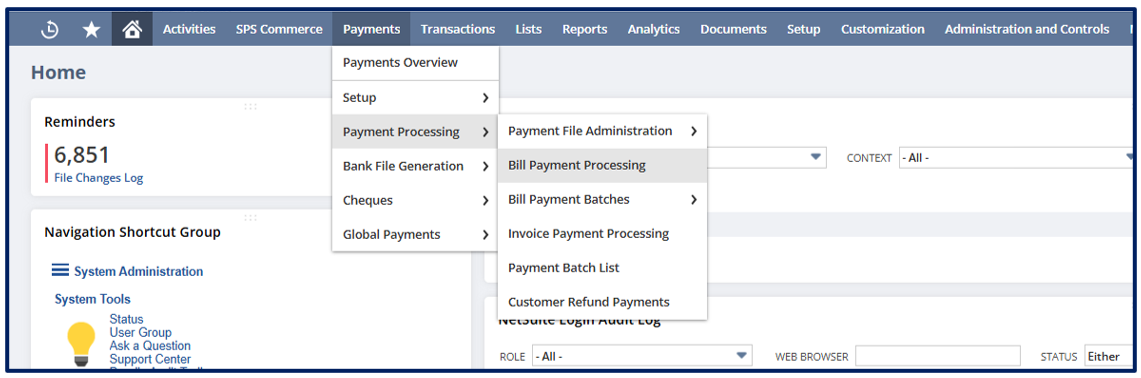
Electronic Payment Process:
To begin the ACH payment process:
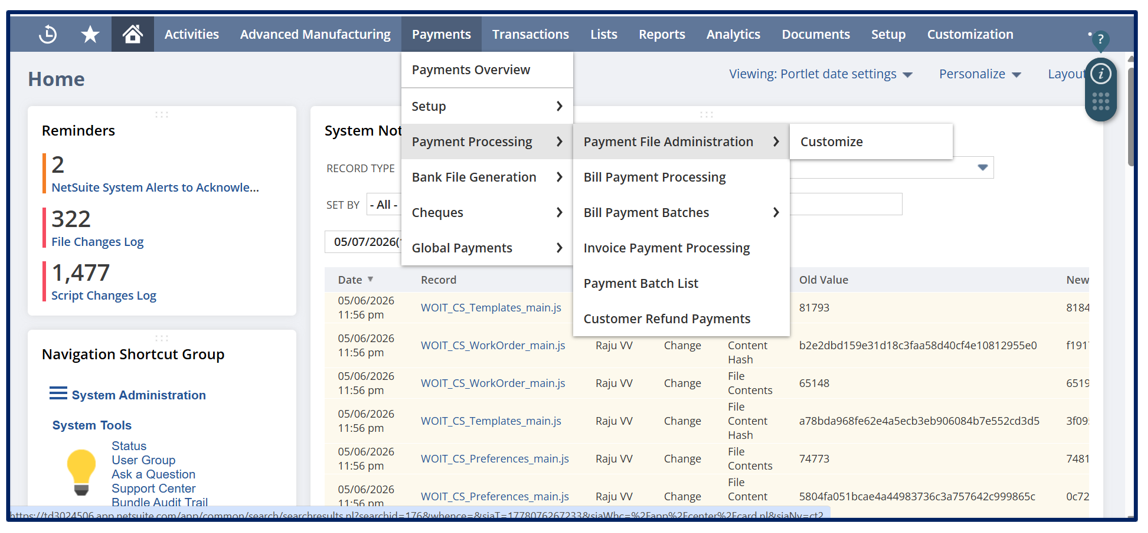
Navigate to Payments > Payment Processing > Bill Payment Processing.

Select the Bank account and relevant A/P Account and enter values in all the mandatory fields like:
- Bank Account: this will populate the relevant subsidiary, bank account format, bank account currency, and base currency.
- A/P Account: displays all unpaid vendor bills with an open status.
- Date to be processed: defines the date on which the bank will process the file.
- Posting period: defines the accounting period in which the selected invoice will be posted.
- EFT File Reference Note: Enter a note to reference this payment batch.

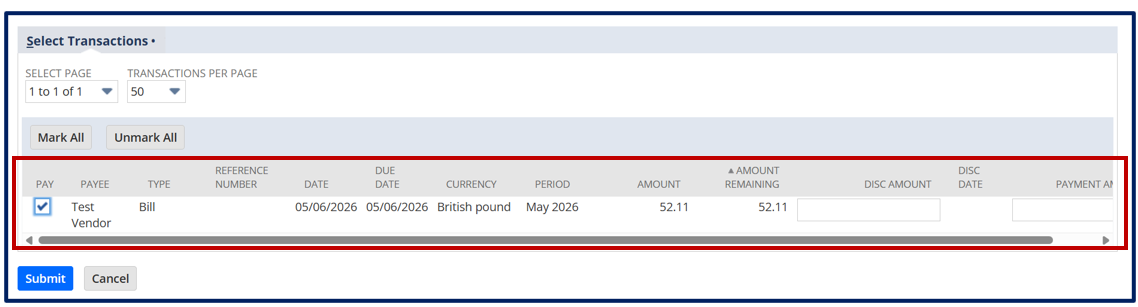
All the open bills will be displayed in the Select Transactions tab.
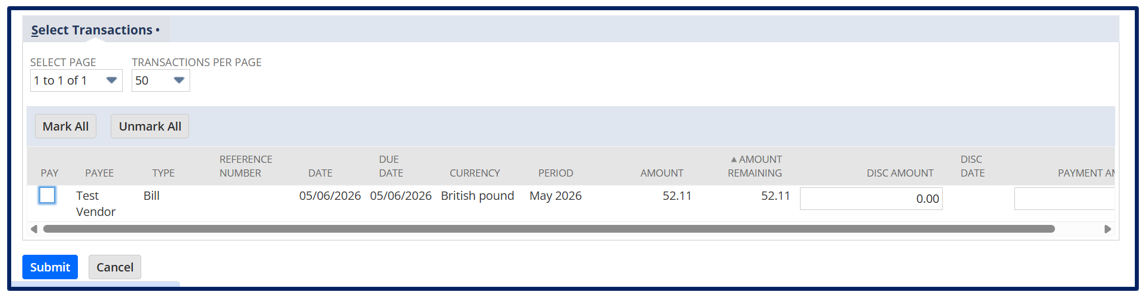
Mark all the bills for which you want to make the payment and click on submit.
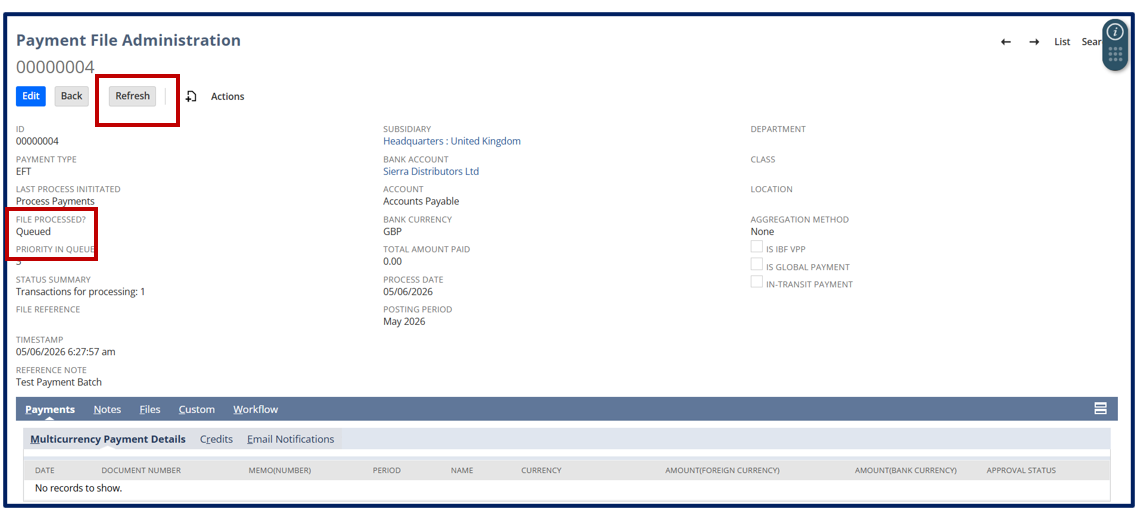
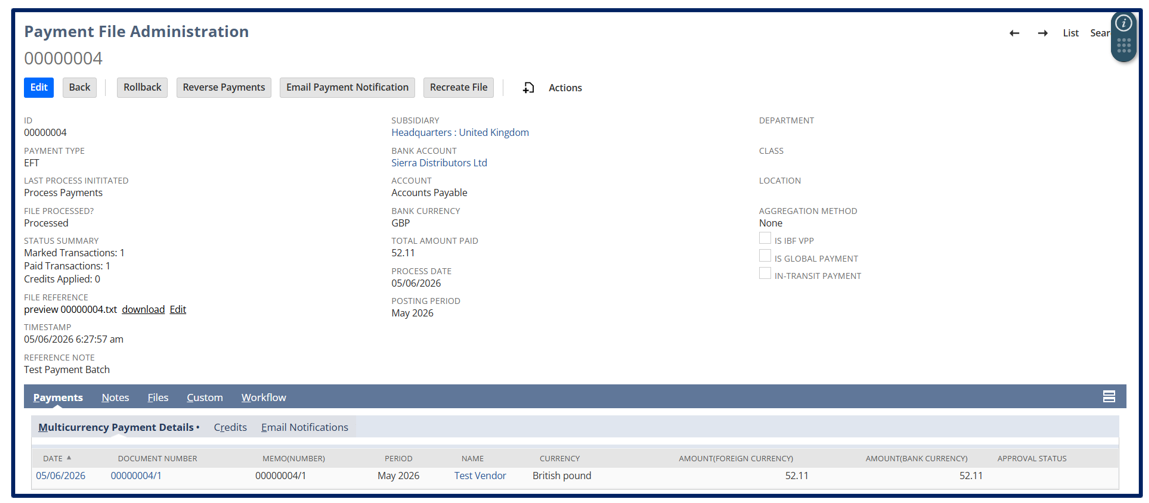
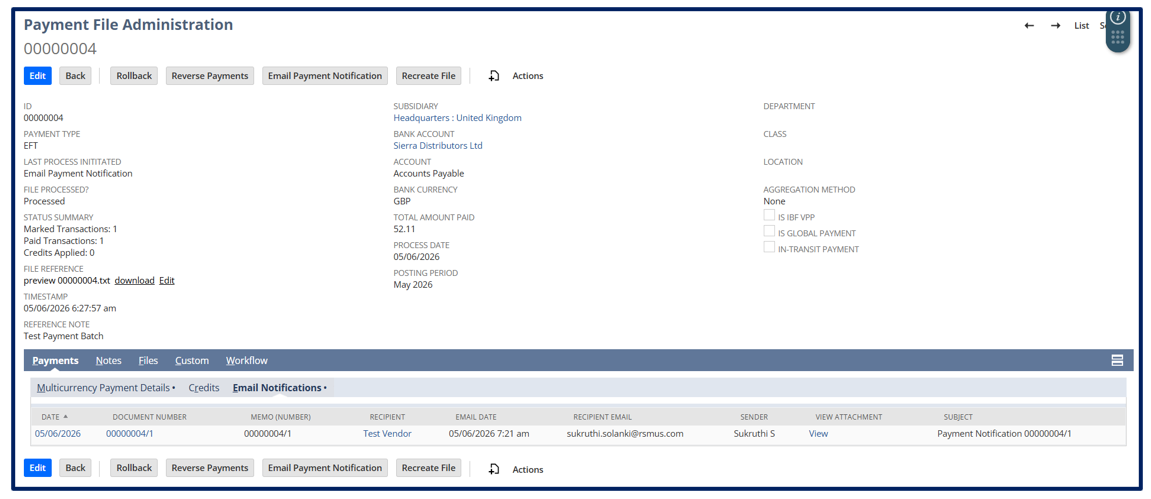
After submitting the payment batch, NetSuite redirects you to the Payment File Administration page, where you can monitor the status of the ACH payment file generation process. This page provides real-time visibility into payment file processing and confirms when files are ready for download or transmission.
Click the Refresh button periodically to check the current status of the payment file. Processing times may vary depending on the number of transactions included in the payment batch, and larger payment runs may take several minutes to complete.
Once processing is finished, the payment file will be available for review, download, and submission to your banking institution.
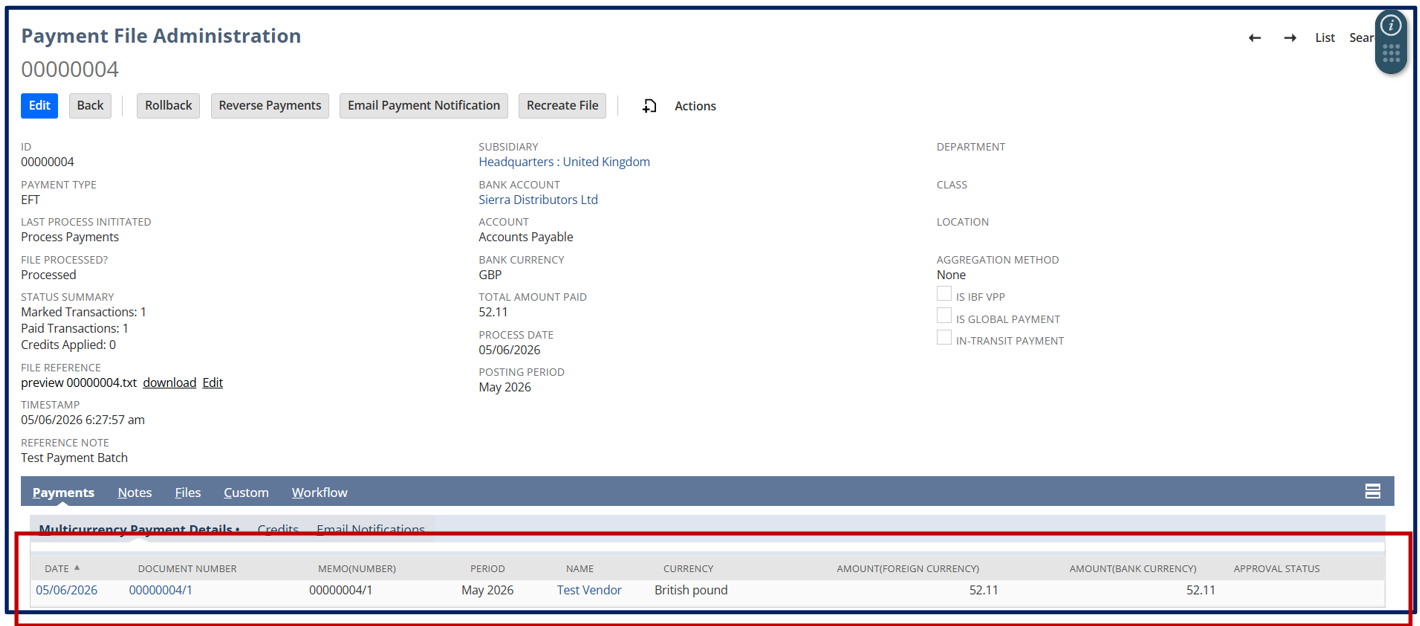
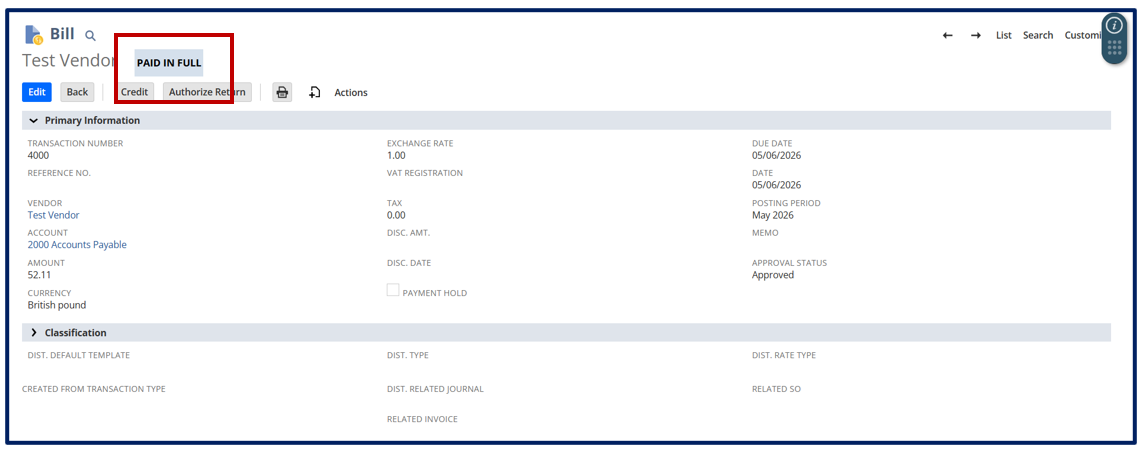
Once processing is complete, bill payments will be created for each bill, and the status of the bills will change from Open to Paid in Full.
View all Payment Files
To check all payment files, follow these steps:
Navigate to Payments > Payment Processing > Payment File Administration
You can view all generated payment files along with the status of each file on this page.
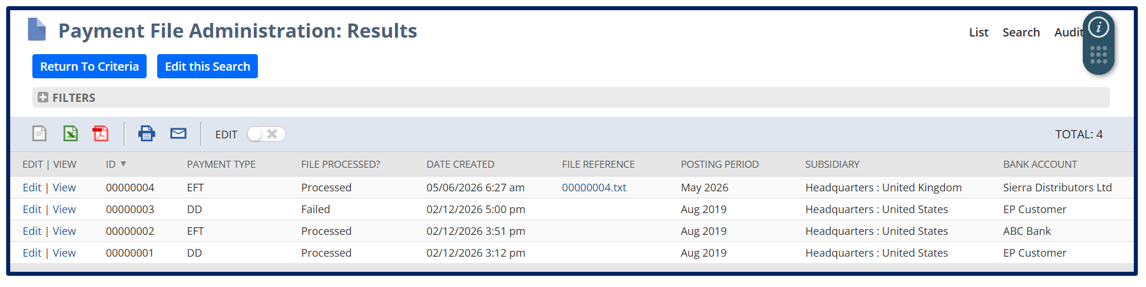
Click on View next to the payment file.
Email Notification
NetSuite allows users to send automated payment notifications to vendors.
Click on Email Payment Notification to send the payment email.
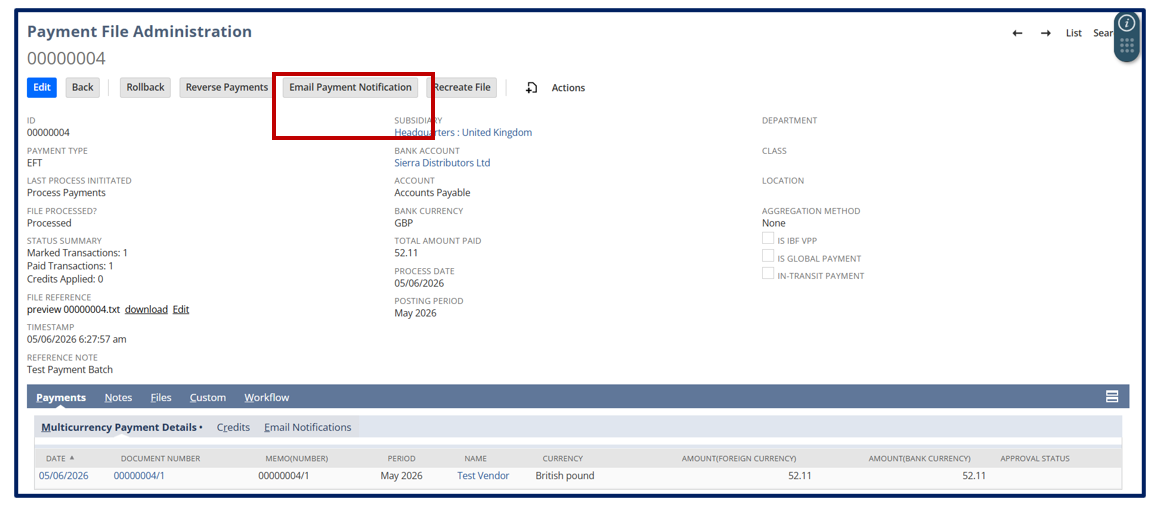
Check the box next to the payment and enter the email address in the Email field. If needed, add additional recipients in the CC and BCC fields. You can also include email notes or custom email notes for each payment record.
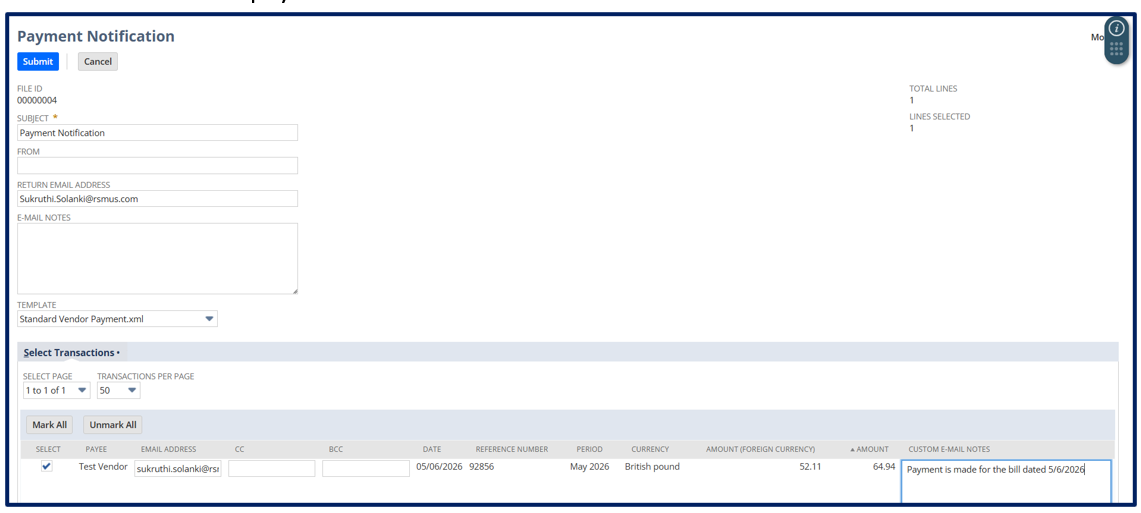
You can view the emails sent in the Payment File, under the Payment subtab, in the Email Notifications section.
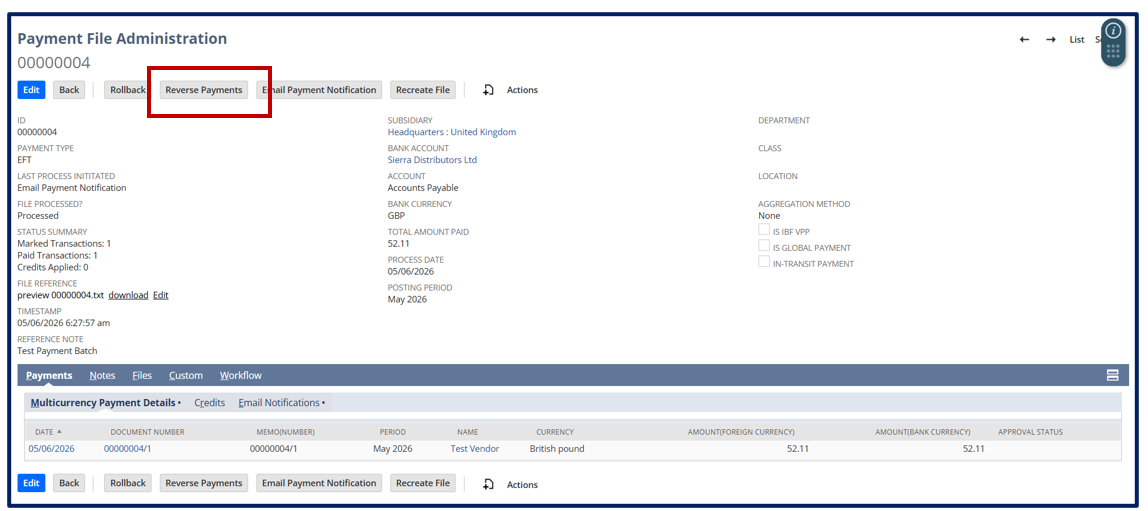
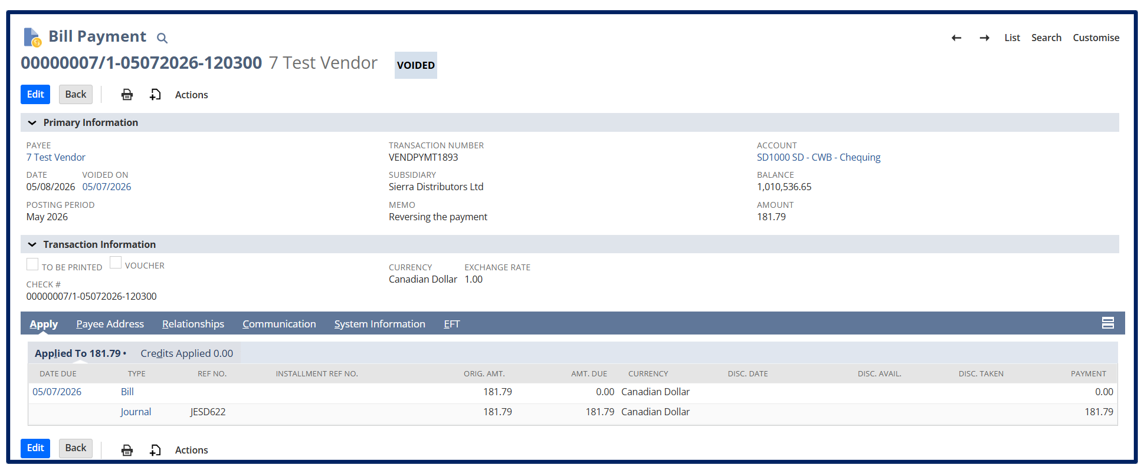
Reverse Payment
Reverse payments only when the payment has already been created/processed and needs to be cancelled or corrected in accounting.
Click Reverse Payments.
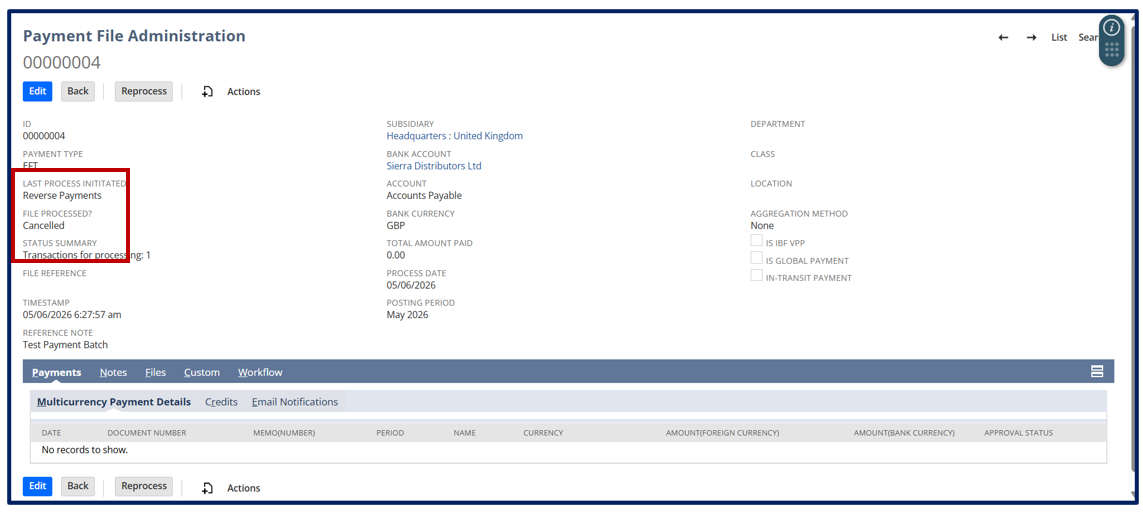
Enter the reason for reversal in the reversal reason box.
Enter the Reversal Date for the journal entry that will be created when the payment is reversed.
If each payment has a different reason for reversal, enter the reason in the Reversal Reason column.

The selected payment transactions are voided with a reversal journal entry.
ACH payment processing in NetSuite enables organizations to automate vendor payments, improve cash flow management, and maintain strong financial controls. When properly configured, ACH workflows reduce manual effort, minimize payment errors, accelerate processing times, and provide complete visibility throughout the payment lifecycle.
At Versich, we help businesses design, implement, and optimize NetSuite accounts payable and ACH payment processes that align with their operational requirements, internal controls, and compliance objectives. Whether you're deploying ACH payments for the first time, enhancing existing workflows, or improving payment security and efficiency, our NetSuite experts can help you streamline payment operations while strengthening financial governance.
Contact Versich to learn how our NetSuite consultants can help modernize your accounts payable processes and maximize the value of your NetSuite investment.