NetSuite is a powerful ERP, but it does not run in isolation. Most businesses using it also rely on a CRM, an eCommerce platform, communication tools, and finance systems that all need to stay in sync. Without automation, that means manual data entry, slow processes, and a team spending hours on work that should happen automatically.
n8n solves this by connecting NetSuite to hundreds of other platforms through a visual, flexible workflow builder. At Versich, we have built NetSuite automation systems for clients across wholesale distribution, financial services, retail, and manufacturing. This guide walks you through exactly how to get started.
What is n8n and How Does It Work with NetSuite?
n8n is an open-source workflow automation platform where each step in a process is a node. You connect nodes together to build automated flows that run without any manual input.
For NetSuite, n8n connects via two methods:
- The NetSuite Community Node (recommended): Supports 150 plus standard NetSuite record types, custom fields, and SuiteQL queries using Token-Based Authentication.
- The HTTP Request Node: Uses NetSuite's REST or SOAP APIs directly, suited for advanced cases the community node does not cover.
Prerequisites Before You Start
- An active NetSuite account with Administrator access
- A self-hosted n8n instance (version 0.187 or later)
- SuiteCloud features enabled in NetSuite
- Token-Based Authentication enabled under Setup
The NetSuite community node only works with self-hosted n8n. We always recommend self-hosted deployments for NetSuite integrations to keep your data on your own infrastructure.
Step 1: Enable Token-Based Authentication (TBA) in NetSuite
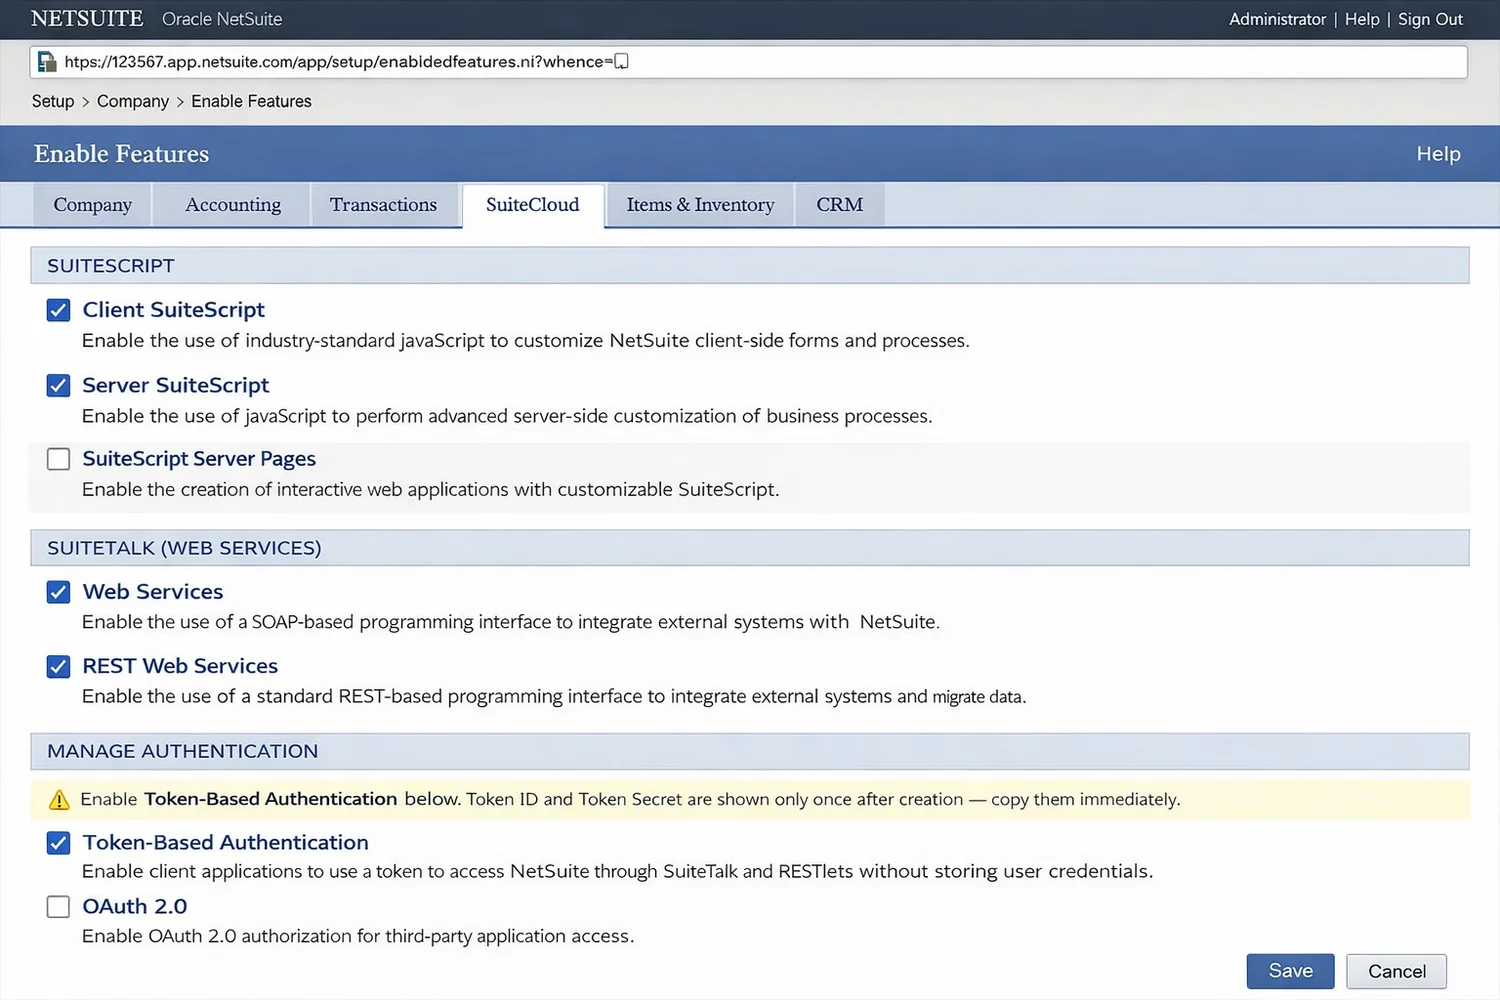
- Go to Setup > Company > Enable Features
- Open the SuiteCloud tab
- Under Manage Authentication, enable Token-Based Authentication
- Also enable Client SuiteScript and Server SuiteScript under the SuiteScript section
- Click Save
Then create a dedicated integration record for n8n:
- Go to Setup > Integration > Manage Integrations > New
- In the Name field, enter: n8n Integration
- On the Authentication tab, keep Token-Based Authentication checked
- Uncheck TBA: Authorization Flow and all checkboxes under OAuth 2.0
- Click Save and immediately copy your Consumer Key and Consumer Secret (they are shown only once and cannot be retrieved again)
Step 2: Install the NetSuite Community Node in n8n
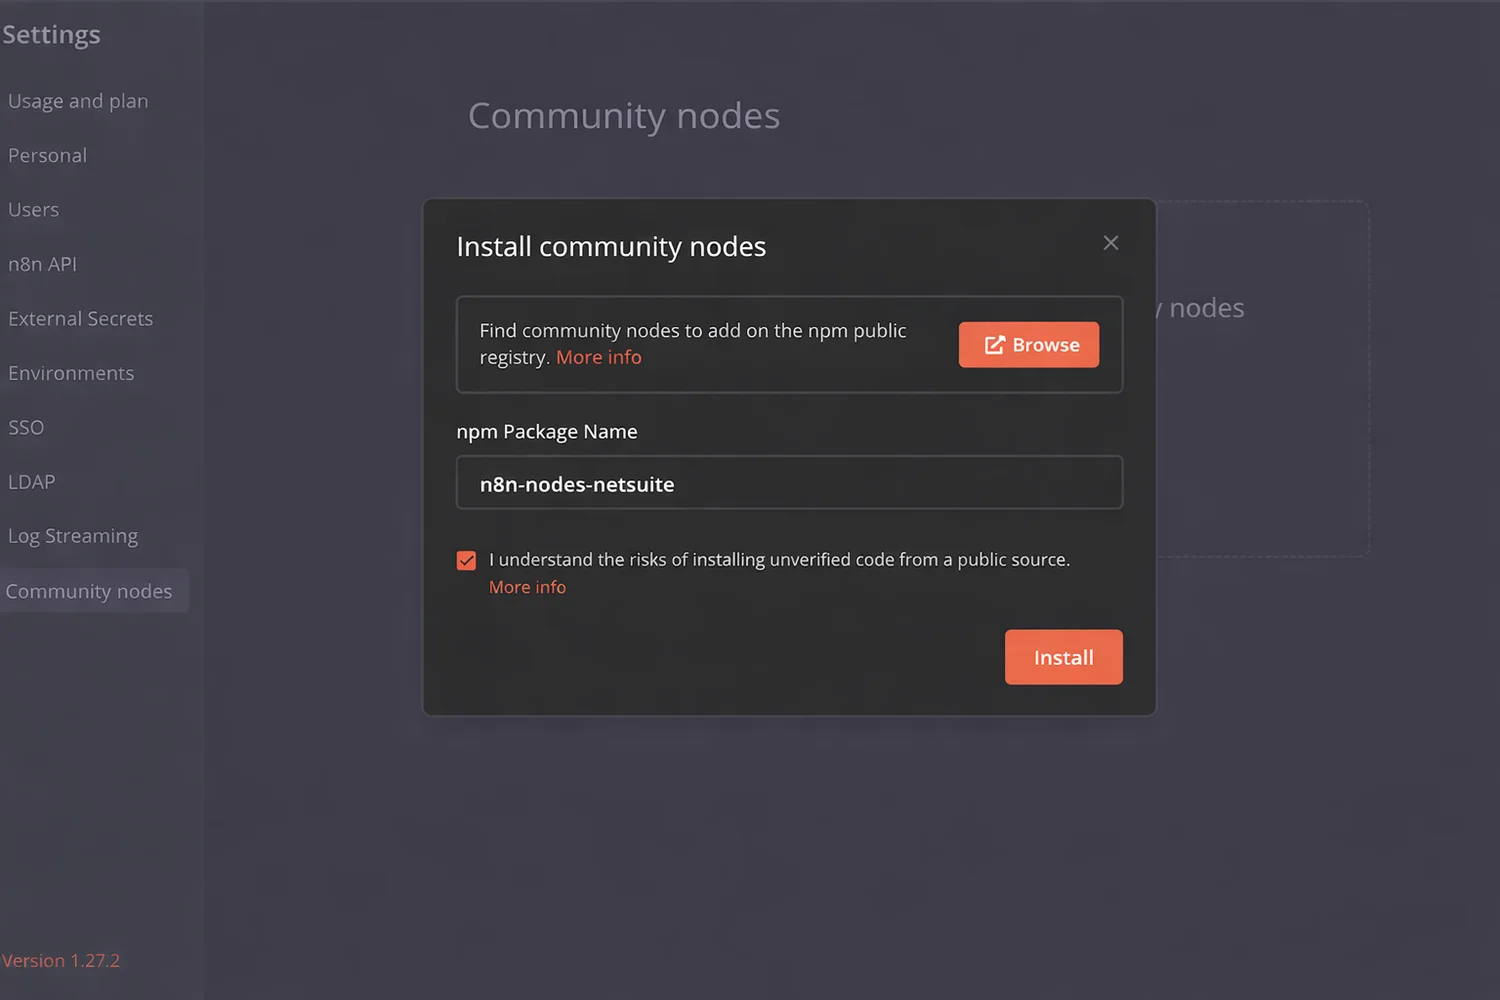
- In your n8n instance, go to Settings > Community Nodes
- Click Install
- Enter the package name: n8n-nodes-netsuite
- Select I understand the risks of installing unverified code from a public source
- Click Install
The NetSuite node will now appear in your workflow node panel. For Docker deployments, add the following line before the font installation step in your n8n Dockerfile:
RUN cd /usr/local/lib/node_modules/n8n &&
    npm install n8n-nodes-netsuite
Step 3: Configure Your NetSuite Credentials in n8n
Create a Role in NetSuite:
- Go to Setup > Users/Roles > Manage Roles > New
- Name it: n8n API Integration Role
- Under the Authentication dropdown, set the role as Web Services Only
- Under Setup permissions, assign at minimum: Log in using Access Tokens, User Access Tokens, and REST Web Services
- Add the relevant Transaction and List permissions that match your use case
- Click Save
Assign the Role to a User:
- Go to Lists > Employees > Employees and select the user for integration
- Click Edit, then go to the Access tab
- In the Role field, select your n8n API Integration Role and click Add
- Click Save
Create an Access Token:
- Go to Setup > Users/Roles > Access Tokens > New
- Select your n8n Integration app, the assigned user, and the n8n API Integration Role
- Click Save and immediately copy the Token ID and Token Secret (they are shown only once)
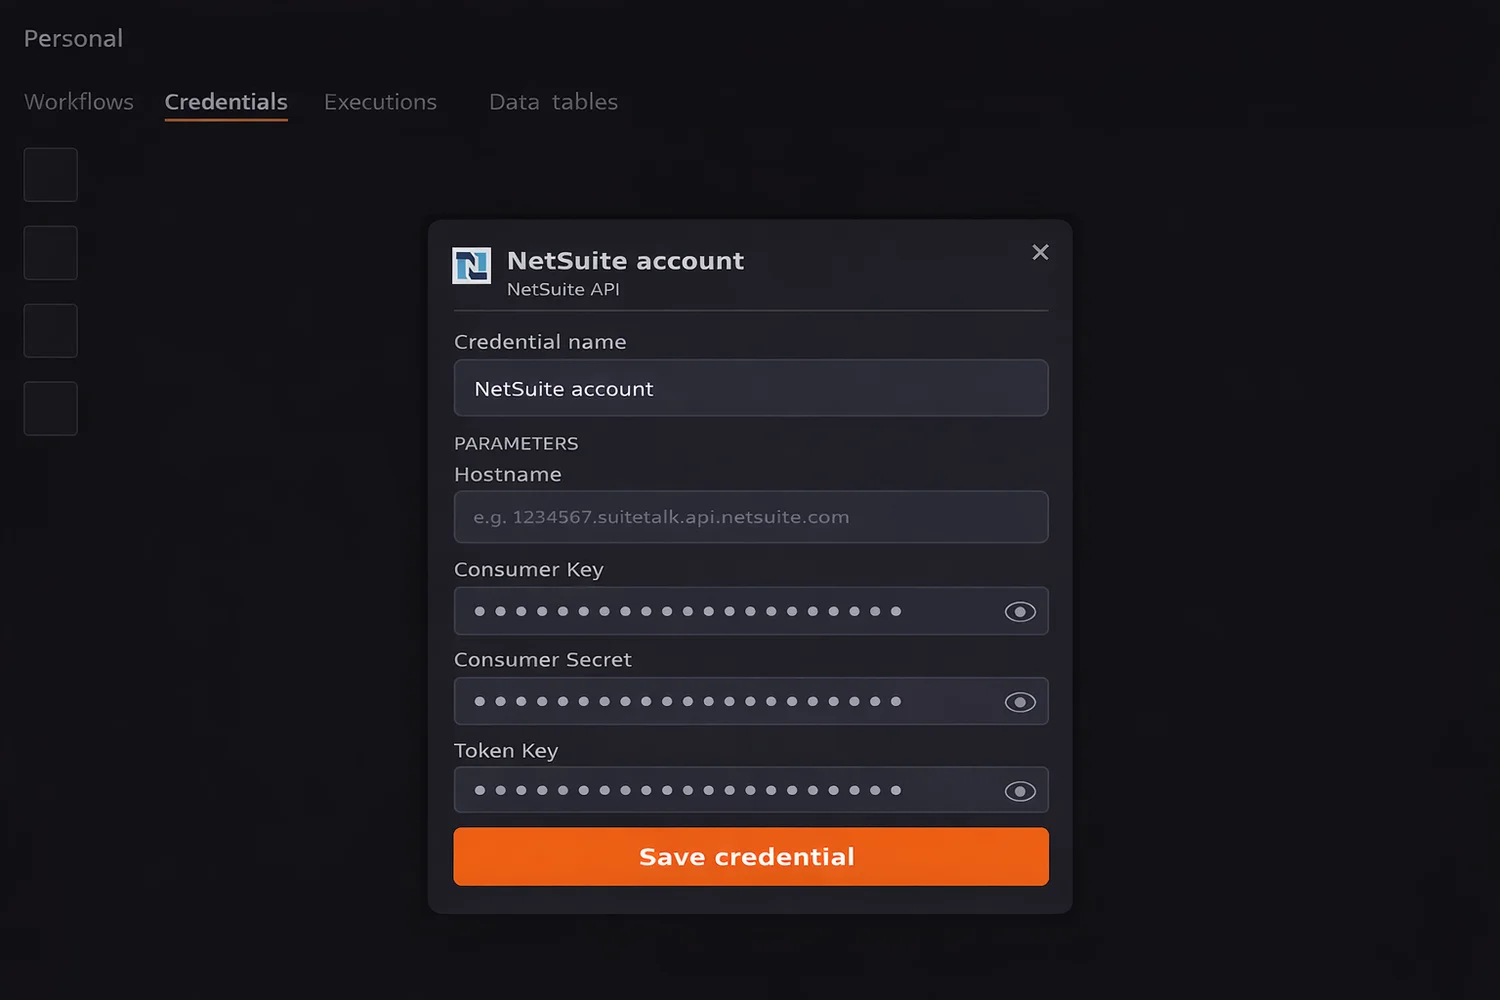
Add the Credential in n8n:
- Go to Credentials > Add Credential > NetSuite
- Enter your NetSuite Hostname (e.g. 1234567.suitetalk.api.netsuite.com) which is the number at the start of your NetSuite URL
- Enter your Consumer Key and Consumer Secret from Step 1
- Enter your Token Key (Token ID) and Token Secret from above
- Click Save
Your n8n instance is now authenticated and ready to connect to NetSuite.
Step 4: Build Your First NetSuite Workflow
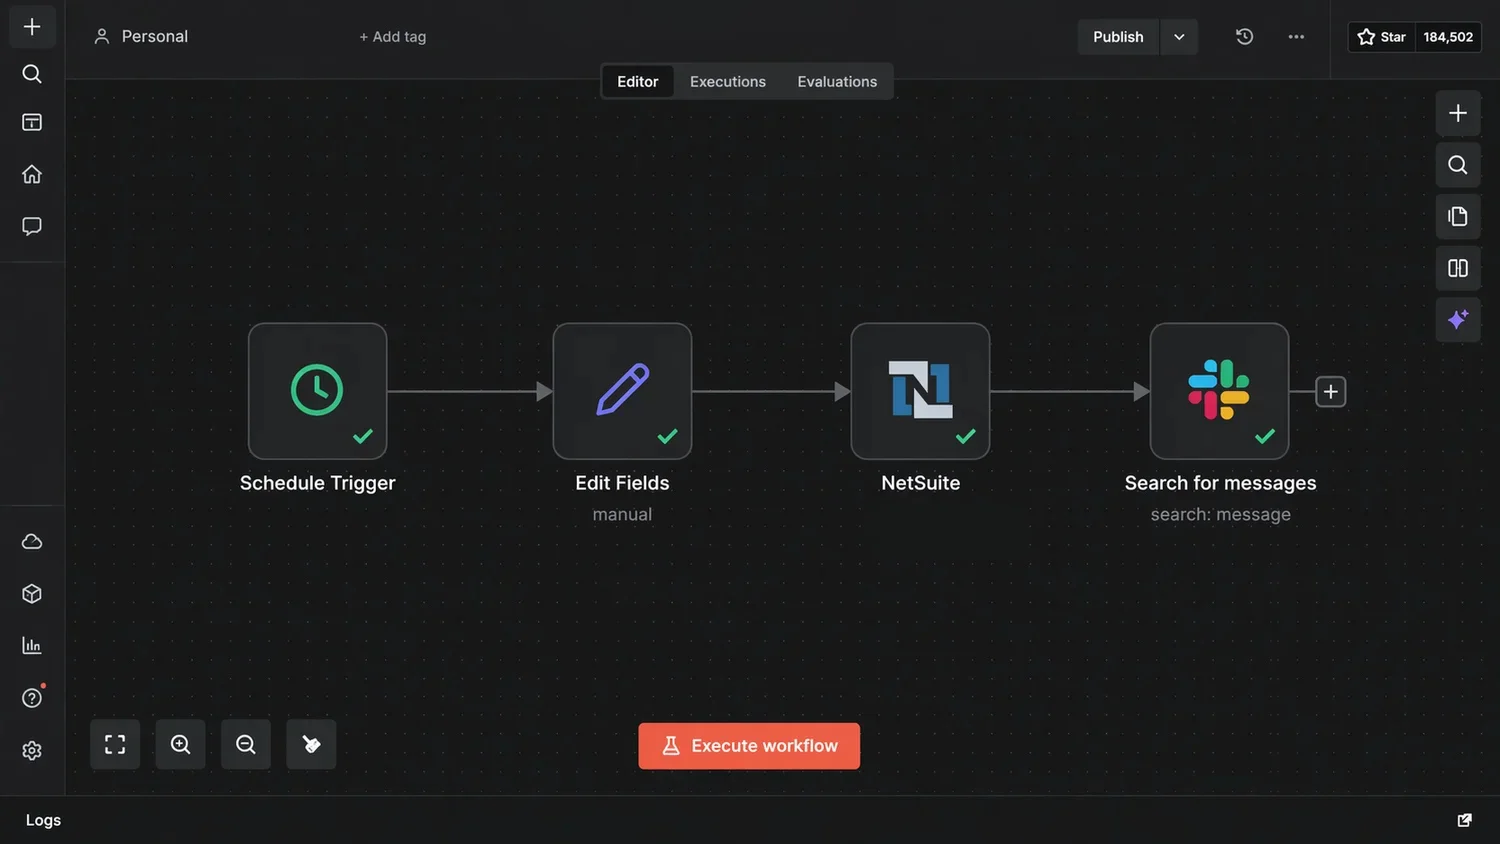
Here is a simple, practical first workflow: create a NetSuite customer record automatically when a new contact is added in HubSpot.
Workflow: HubSpot New Contact to NetSuite Customer
- Trigger Node: HubSpot New Contact trigger
- Set Node: Map HubSpot contact fields to NetSuite customer fields
- NetSuite Node: Action: Create Record, Record Type: Customer
- Slack Node (optional): Notify your sales team when the record is created
This workflow takes under 15 minutes to build and runs automatically from then on.
Step 5: Use SuiteQL to Query NetSuite Data
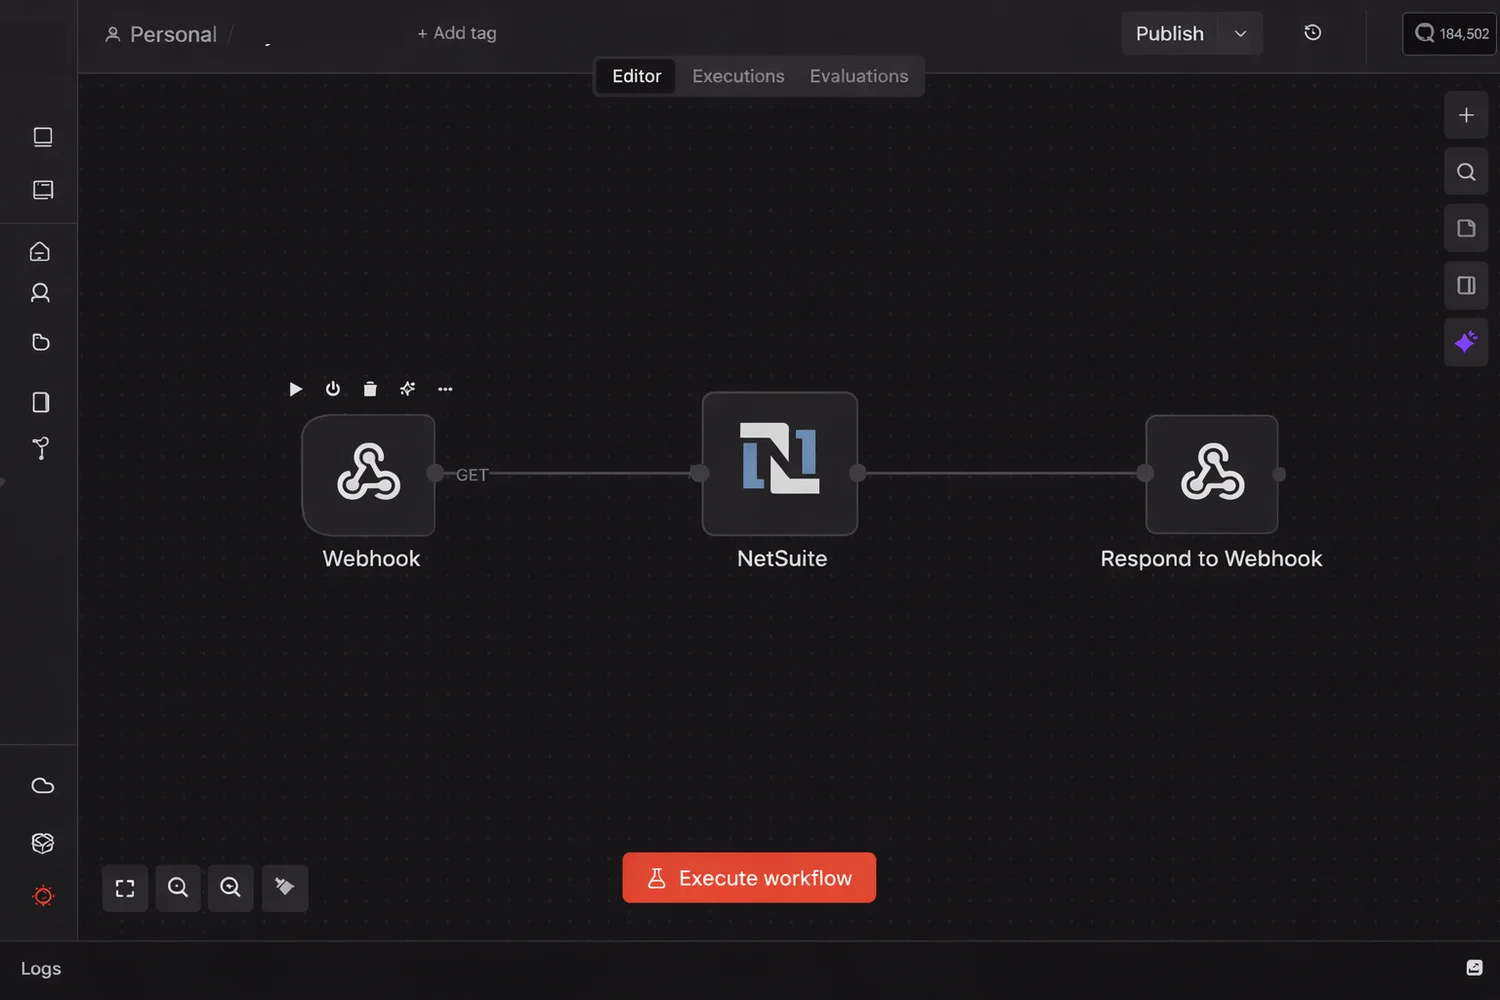
SuiteQL is NetSuite's SQL-like query language for pulling real-time data from your account. In n8n, you can trigger SuiteQL queries via a webhook to feed dashboards, reports, or other systems.
Setup:
- Add a Webhook Node as your trigger
- Add a NetSuite Node and select the SuiteQL Query action
- Pass your query, for example:
SELECT id, companyName, email
FROM customer
WHERE dateCreated > '2026-01-01'
LIMIT 100- Add a Respond to Webhook Node to return results as JSON
Any system that can call a URL (Power BI, a custom dashboard, another workflow) can now pull live NetSuite data on demand.
Real NetSuite Automation Workflows to Build Today
Order to Fulfillment Automation
- New Shopify order triggers an n8n workflow
- Sales Order is created in NetSuite automatically
- Tracking update is pushed back to the storefront on fulfillment
- Customer receives an automated shipping notification
Invoice Processing and Approval
- Vendor invoices arriving by email are parsed by n8n
- Fields (supplier, amount, due date) are extracted and matched to the Purchase Order in NetSuite
- Clean matches are approved and posted automatically; discrepancies are flagged for review
Low Stock Reorder Automation
- n8n monitors NetSuite inventory on a schedule
- When stock drops below threshold, a Purchase Order is created in NetSuite and emailed to the supplier
- Your procurement team gets a daily Slack summary
CRM to NetSuite Sync
- New or updated records in Salesforce or HubSpot are synced to NetSuite in real time
- Deduplication logic prevents duplicate records from being created
Automated Financial Reporting
- SuiteQL pulls revenue, AR, and cash flow data on a schedule
- Reports are sent to your finance team by email and pushed to Power BI for live dashboards
How Versich Builds NetSuite and n8n Automation Systems
At Versich, we specialise in both NetSuite and n8n. Most integration agencies know automation tools but not ERP logic. We know both.
Every engagement includes discovery, architecture design, sandbox testing, self-hosted deployment with HIPAA, SOC2, and GDPR compliance where needed, and full team training after launch. Our clients typically go live in 2 to 3 weeks and see measurable results within the first 30 days.