
Modern teams need reliable CI pipelines so every code change is built, tested, and ready to deploy without manual effort. This guide walks through building a simple Go web app and wiring it into a GitLab CI pipeline using a self‑hosted GitLab Runner on an Azure VM, covering setup end-to-end.
Setting up an Azure VM
Before setting up a virtual machine, it helps to briefly understand Azure itself.
Microsoft Azure is a cloud platform that delivers a wide range of computing services—such as servers, storage, databases, networking, software, analytics, and AI—over the internet.
Creating an Azure account is straightforward: visit the official Microsoft Azure site, complete the signup form, and you’re ready to start using its services. If you have a valid student email address, you may also be able to access certain Azure services at no cost.
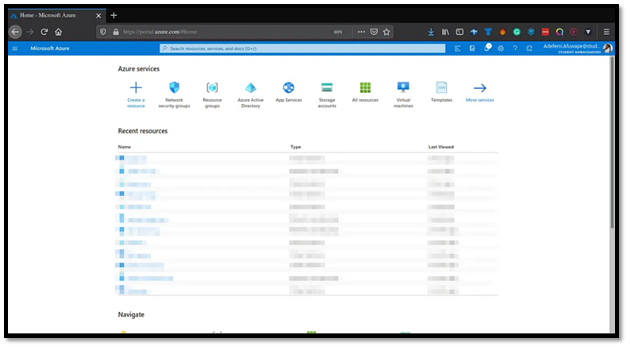
In this guide, we’ll create an Ubuntu virtual machine (VM) on Azure, walking through each step with explanations and screenshots. Once your Azure account is set up, sign in to the Azure portal, where you’ll land on the main dashboard (your view may differ slightly depending on whether you already have resources created).
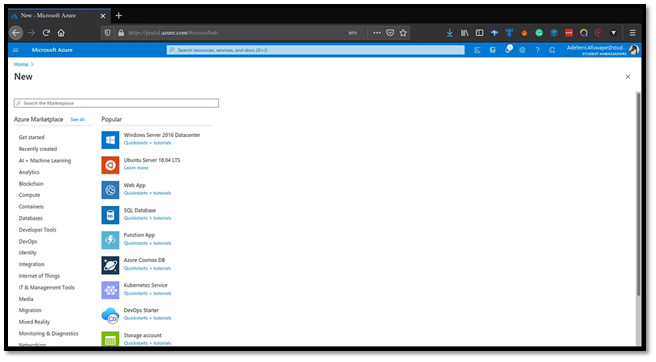
The first step is to create a resource group.
A resource group acts as a single container that holds all the resources needed for an application, such as a web server, database, virtual machine, and storage, so you can manage them together instead of spreading them across multiple groups.
Click the ➕ icon to create a new resource group, and you will be taken to the next screen where you can configure its details.
Since we will be working with Ubuntu Image, select Ubuntu Server 18.04 LTS , and you should have this displayed on your screen:
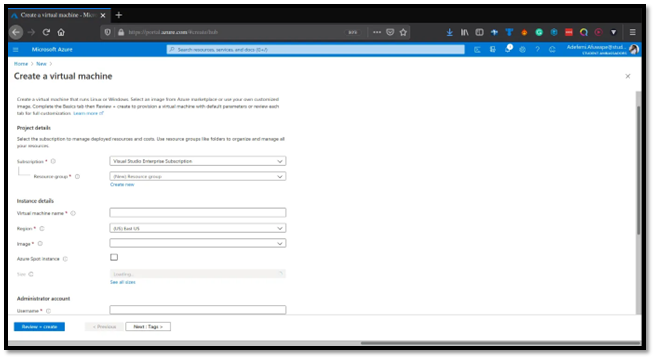
Using a Microsoft Account for the Azure setup. This account provides an Azure Subscription, which is required for authenticated access to Azure products and services.
Subscription Setup:
Click the dropdown to select your subscription (or create a new one if needed)
Since we have no resource group yet, click "Create new" and name it gitlab-prac
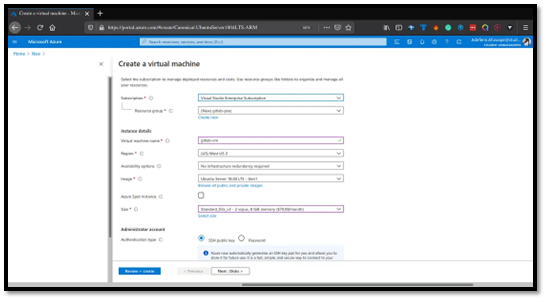
Virtual Machine Configuration:
VM Name: gitlab-vm (must be globally unique - green checkmark confirms availability)
Region: West US (choose any region near you; Azure offers 54 regions across 140 countries)
Other settings: left as defaults
Region Note: Azure regions are geographical areas containing one or more data centres for low-latency service delivery.
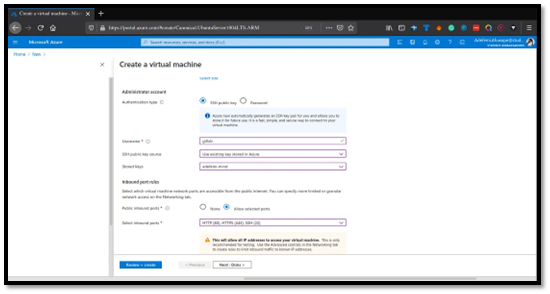
Next, configure how you'll connect to the virtual machine (VM). Azure offers two options: SSH public key or password authentication.
If you already have an SSH key pair (like adefemi-mind), use it. Otherwise, create a new one:
Under SSH Public Key Source, click the dropdown and select Generate new key pair.
Enter a name for the key pair (e.g., go-gitlab-azure-key).
Azure will generate both private and public keys—download the private key for SSH access.
For initial VM access, ensure port 22 (SSH) is allowed in the Inbound ports section (selected by default).
Optionally, open additional ports now:
Port 80 (HTTP)
Port 443 (HTTPS)
These will be useful later for your Go web server and production traffic.
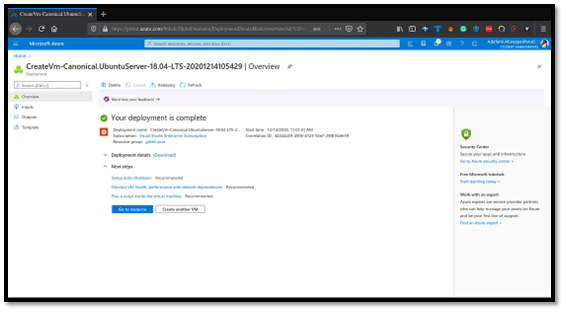
With all this filled, click on Review+Create. You will also need to download your Key, and depending on your browser settings, you should find it in the Downloads section of your PC.
You can also add some additional settings on the disk tab, networking, management, advanced and tags, but for this post, I will be going with the default settings. You will need to wait for a few minutes for the resources to get created and you should get the output below
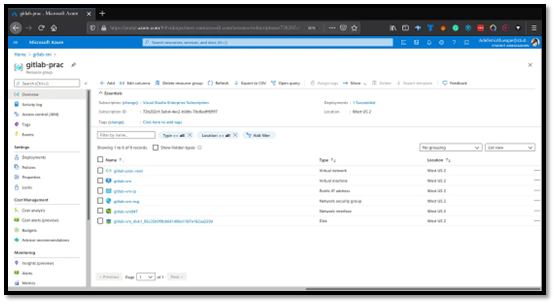
Click on Go to resource , and you should see this output. Azure creates a virtual network, public IP address, NSG, network interface and a disk just like the image below. You should note that the name will be different
Next, SSH into the VM you created. Click on your VM name (e.g., gitlab-vm), go to the Connect tab, select SSH, and ensure you have read-only access to the downloaded private key.
Navigate to the key's location and run:
Next, SSH into the VM you created. Click on your VM name (e.g., gitlab-vm), go to the Connect tab, select SSH, and ensure you have read-only access to the downloaded private key.
Navigate to the key's location and run:
Then connect using:
You should see a successful connection output like this:
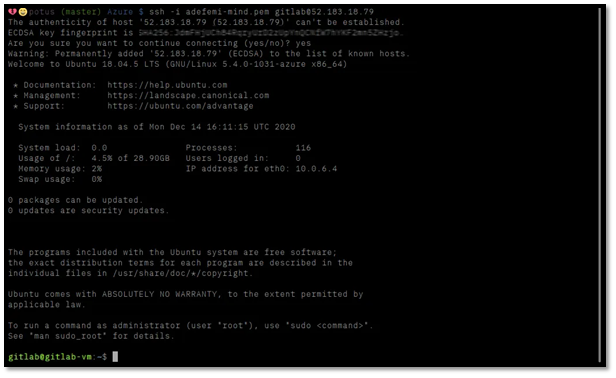
* Documentation: https://help.ubuntu.com
* Management: https://landscape.canonical.com
* Support: https://ubuntu.com/advantage
azureuser@gitlab-vm:~$
Yeah, you are now running an Ubuntu Server in the Microsoft Azure cloud
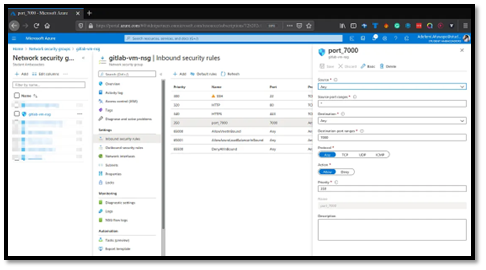
Opening a port on Azure using NSG
Your Go web server will listen on a custom port (e.g., 7000), so traffic must be allowed through the VM’s Network Security Group (NSG).
In the Azure portal, go to Network security groups and select the NSG attached to your VM’s network interface or subnet.
Open Inbound security rules → Add and create a rule:
Source: Any
Destination: Any
Destination port ranges: 7000
Protocol: Any
Action: Allow
Priority: e.g., 350
Name: port_7000
Save the rule so requests to http://your-vm-ip:7000 reach your Go server.
Installing Docker and Golang
The GitLab Runner will use Docker as the executor, and you’ll build a Go app on the same VM.
Install Docker
sudo apt-get install -y ca-certificates curl gnupg lsb-release
sudo mkdir -p /etc/apt/keyrings
curl -fsSL https://download.docker.com/linux/ubuntu/gpg | sudo gpg --dearmor -o /etc/apt/keyrings/docker.gpg
echo \
"deb [arch=$(dpkg --print-architecture) \
signed-by=/etc/apt/keyrings/docker.gpg] \
https://download.docker.com/linux/ubuntu \
$(lsb_release -cs) stable" | \
sudo tee /etc/apt/sources.list.d/docker.list > /dev/null
sudo apt-get update
sudo apt-get install -y docker-ce docker-ce-cli containerd.io
sudo usermod -aG docker $USER
Log out and back in so your user can run Docker without sudo.
Install Go
Download and install a stable Go version (adjust version as needed):
curl -LO https://go.dev/dl/go1.22.5.linux-amd64.tar.gz
sudo rm -rf /usr/local/go
sudo tar -C /usr/local -xzf go1.22.5.linux-amd64.tar.gz
echo 'export PATH=$PATH:/usr/local/go/bin' | sudo tee /etc/profile.d/go.sh
source /etc/profile.d/go.sh
go version
Building a simple Golang web server
Create a minimal HTTP server to test the pipeline:
cat << 'EOF' > main.go
package main
import (
"fmt"
"log"
"net/http"
)
func handler(w http.ResponseWriter, r *http.Request) {
fmt.Fprintln(w, "Hello from Go on Azure via GitLab Runner!")
}
func main() {
http.HandleFunc("/", handler)
log.Println("Server listening on :7000")
if err := http.ListenAndServe(":7000", nil); err != nil {
log.Fatal(err)
}
}
EOF
Run it locally on the VM:
From your browser, visit http://<vm-public-ip>:7000 to confirm you see the message and the NSG rule is working.

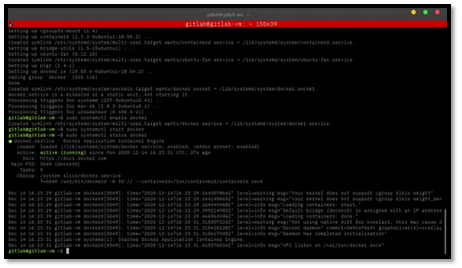
Setting up and installing GitLab Runner
Now register a self‑hosted GitLab Runner on this Azure VM so GitLab can build and test your Go app automatically.
Install GitLab Runner
sudo apt-get install -y gitlab-runner
Register the runner
In your GitLab project:
Go to Settings → CI/CD → Runners and copy the registration token.
On the VM, run:
Provide values when prompted:
GitLab URL: https://gitlab.com/ (or your self‑hosted URL)
Registration token: <project token>
Description: azure-go-runner
Tags: e.g., go,azure
Executor: docker
When asked for the default Docker image, you can use golang:1.22 so builds run inside a Go‑ready container.
Start and enable the service:
sudo systemctl start gitlab-runner
Creating a GitLab pipeline for the Go web server
With the runner in place, define a basic CI pipeline to build and test your Go app.
In the root of your GitLab repo (containing main.go), create .gitlab-ci.yml:
- build
- test
variables:
GO_VERSION: "1.22"
build:
stage: build
image: golang:${GO_VERSION}
script:
- go mod init example.com/go-web || true
- go mod tidy
- go build -o app .
artifacts:
paths:
- app
test:
stage: test
image: golang:${GO_VERSION}
script:
- go test ./...
Commit and push to the GitLab repository:
git commit -m "Add basic Go web server and CI pipeline"
git push origin main
GitLab will pick up the pipeline, assign jobs to your Azure Go runner, build the Go binary inside Docker, and run tests automatically for each push.